
HowToCreateAnApp
How to create an app
Section titled “How to create an app”An app is a JavaScript or TypeScript package that provides a web component. The web component can in turn be used within a html file in the same project. It can also be distributed on its own to be embedded into different host sites.
This repository comes prepared with an empty app in src/apps/empty, which is embedded into the site at src/sites/empty/index.html.
Required setup
Section titled “Required setup”To create the application package for an app, first initialize a package.json file in a new directory.
Application packages should by convention be placed in src/apps/<APP_NAME>, but technically they may be placed anywhere in the src directory.
All Trails packages are node packages to benefit from (p-)npm’s dependency management.
Create a very simple package.json (opens in a new tab) such as this:
{ "name": "my-app", "private": true, "dependencies": { "@open-pioneer/runtime": "catalog:" }}NOTE
Dependencies in the preceding example snippet (and some other snippets in this documentation) use the version specifiercatalog:. We use catalogs to manage the versions of our dependencies at a central location. The actual version is maintained inpnpm-workspace.yaml(see documentation (opens in a new tab)).
A package.json file should always contain at least a name, usually some dependencies and either private: true or a valid license (in case you intend to publish it).
After creating a new package or modifying the dependencies of an existing package, you should run pnpm install:
$ pnpm installNext, your app needs a build.config.mjs configuration file.
This file contains metadata about your app that influences how the system will build it.
The minimal configuration is an empty object:
import { defineBuildConfig } from "@open-pioneer/build-support";
export default defineBuildConfig({});Implementing the app
Section titled “Implementing the app”We’re going to create an app with a very simple UI.
Create an app.ts file (or.js) which is by convention located at <APP_NAME>/app.ts.
This file defines the web component (i.e. <my-app-element>):
import { createCustomElement } from "@open-pioneer/runtime"; // (1)import * as appMetadata from "open-pioneer:app"; // (2)import { AppUI } from "./AppUI"; // (3)
// (4)const Element = createCustomElement({ component: AppUI, appMetadata});
// (5)customElements.define("my-app-element", Element);This is the setup required for a minimal Open Pioneer Trails application:
-
(1)
createCustomElementis the central framework function responsible for defining the actual web component. It is exported by@open-pioneer/runtime, a package all Open Pioneer Trails applications must depend on. -
(2) The special
open-pioneer:appmodule provides automatically gathered metadata about your application. This module is implemented in the build system: it automatically scans your app and its dependencies. -
(3) The application’s UI is a simple react component. We will define it in the next step.
-
(4) We call
createCustomElement(), passing a reference to the UI and the application’s metadata. This will create anElementclass, inheriting fromHTMLElement, that provides a Web Component (opens in a new tab). -
(5)
customElements.define()registers our element class as a custom element. It can now be used, for example, from HTML:<my-app-element></my-app-element>. NOTE: custom element names must always contain a-so they don’t collide with builtin HTML tags.
Finally, we define the application’s UI as a React (opens in a new tab) component.
This example uses JSX Syntax (opens in a new tab) in a .tsx file.
It allows you to embed html-like constructs directly into your code:
export function AppUI() { return <div>Hello World!</div>;}Embedding the app
Section titled “Embedding the app”We have created a simple application, but we can’t see it yet.
The next step is to create a .html site for testing: it will embed the app and contain no other content.
We usually place sites into src/sites/<SITE_NAME>/index.html, but just like apps and packages, they may be placed anywhere.
<!doctype html><html lang="en"> <head> <meta charset="UTF-8" /> <meta name="viewport" content="width=device-width, initial-scale=1.0" /> <title>Demo</title> </head> <body> <my-app-element></my-app-element> <script type="module" src="/apps/my-app/app.ts"></script> </body></html>Note You can create multiple sites that can all use the same app, perhaps in different configurations. You can also use multiple apps in the same site, multiple instances of the same app, or no app at all. All features of Vite (opens in a new tab) are supported, so you could also develop an entire website around your app.
You can now launch the development server and inspect the result:
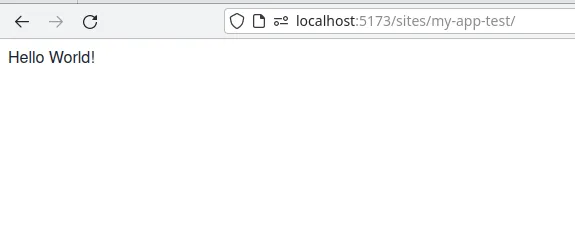
$ pnpm install$ pnpm run dev# VITE v4.0.4 ready in 518 ms## ➜ Local: http://localhost:5173/# ➜ Network: use --host to expose# ➜ press h to show helpVite derives the site’s URL from the index.html file’s path in the source directory, so it will serve your site at http://localhost:5173/sites/my-app-test/ (opens in a new tab):
Including static assets
Section titled “Including static assets”Vite has out of the box support for two ways to include static assets:
-
Importing static assets: You can import the content of files (or URLs to the content) into your source code.
For example:
src/apps/my-app/someFile.ts import myImage from "./my-image.png"; // (1)import someFile from "./some-asset.pdf?url"; // (2)import jsonContent from "./my-json-data.json"; // (3)- (1) Imports an image file as a URL (
myImagewill be string URL that points to the image). Vite has direct support for image file extensions. - (2) Explicitly imports a file as a URL. Very similar to the previous example, but useful for cases where the file extension is not immediately supported by Vite.
- (3) Imports the data in the referenced JSON file directly as a JavaScript object.
Vite will automatically bundle the file with your application. The mechanism depends on the file’s type and the way it has been imported, for example:
- An asset file may be created for larger images (e.g.
dist/www/assets/my-image-123456.png) - Small images or file contents may be embedded as a string (text content, or Base64 URL, etc.)
- Imported data (such as JSON) may be directly embedded into the source code
For more details, see Vite’s documentation on assets (opens in a new tab).
- (1) Imports an image file as a URL (
-
Referencing public assets: You can place files into Vite’s public directory (at
src/publicby default). These files will be copied to the output directory without any modification. This is useful for files that must be present at a specific location (instead ofassert-12345.ext). Use cases are well known file names likefavicon.icoorrobots.txt, or files that are designed to be edited by an administrator (e.g.my-config-file.json).Public files can be imported, too:
src/apps/my-app/someFile.ts import configUrl from "/my-config-file.json?url"; // (1)// (2)const response = await fetch(configUrl);const config = await response.json();-
(1) Imports the file
/my-config-file.jsonas a URL. The leading/is important: it references the root of the public directory.During development, Vite’s dev server will serve the current file content from
src/public/my-config-file.json. When building for production, Vite will copy that file to thedist/wwwdirectory and the URL will point to that file instead. -
(2) Fetches the file and parses it as JSON. This works in both development and production, since Vite generates a correct URL for both cases.
Edits made after building the app will be visible because we always fetch the current content of the file. This is different from the previous approach, which always uses the file content at build time.
For more details, see Vite’s documentation on public assets (opens in a new tab).
-
When to use which approach
Section titled “When to use which approach”- Use static assets if you only need the static data at build time. This should be the most common case.
- Use public assets if you care about the file’s location on your web server.
- Use public assets if the file is meant to be edited to change the behavior of the application without rebuilding it.
NOTE: Static assets work everywhere, even as part of a published package. Note that you may have to configure
assetsin your package’sbuild.config.mjs, see `publishConfig.assets.
NOTE: A published package cannot provide public assets at this time (Vite’s mechanism only works for apps). This requirement is tracked here (opens in a new tab), let us know if you need that feature.
Building the site
Section titled “Building the site”Until now, we have just used the app and the site together with Vite’s dev server. During development, all sites and apps are always available. However, not all sites are designed to be shipped (for example, internal test sites should not be included in a release), and not all apps are designed to be embedded into arbitrary sites.
The Pioneer Vite plugin (opens in a new tab) supports many use cases in its configuration.
It is already included in your vite.config.ts and just needs to be customized:
plugins: [ pioneer({ // Include src/index.html in the build? rootSite: true,
// Include <NAME>/index.html in the build? sites: ["sites/my-app-test"], apps: [] }) // ...];We have added reference to the new site in the sites array.
This tells the plugin to make the site’s index.html (and all resources referenced by it)
available in the built output.
Now, build the project:
$ pnpm run buildThe build script compiles your project and writes the result into dist/www.
Because the new site was included in the build, you will now find the file dist/www/sites/my-app-test/index.html.
You can confirm that your site works as expected by using the preview server:
$ pnpm run preview
➜ Local: http://localhost:4173/ ➜ Network: use --host to exposeVisiting http://localhost:4173/sites/my-app-test (opens in a new tab) in your browser should render the same result as during development.
Building the app
Section titled “Building the app”Depending on your goals, you might want to distribute your app as a reusable web component, designed to be embedded into another website.
To achieve this, you can build the app directly.
NOTE Building an app directly and using it from different sites in your project is possible at the same time: one does not influence the other.
plugins: [ pioneer({ rootSite: true, sites: [], apps: ["my-app"] }) // ...];We have added my-app to the apps array.
This will tell the vite plugin to create a my-app.js in the dist/www directory.
That file can be directly imported (e.g. via <script> like in our test site above) by users of your application, once your host the www directory somewhere.
For more details about our vite plugin, head over to its Documentation (opens in a new tab).
Clean application URLs
Section titled “Clean application URLs”The default file layout in this repository is designed for multiple applications and sites within the same project (for example, one or more productive sites and a few test sites). For this reason, the default root site is an overview page mainly aimed at developers. It links to other sites in the project:
If your project focuses on a single, central site, you may wish to invert this layout:
- Main site:
http://example.com/ - (optional) Overview site:
http://example.com/app-overview/ - (optional) Other apps:
http://example.com/test-app/
To achieve this, simply swap the corresponding .html files:
- Move
.htmlfiles:- Move
src/index.htmltosrc/app-overview/index.html(or any other location in the source directory). - Move
src/sites/my-app/index.htmltosrc/index.html. - Relative links in your
.htmlfiles may need adjusting!
- Move
- Update
vite.config.ts:-
Remove the reference to
my-appand (optionally) include the new app overview site, if you want it built:vite.config.ts pioneer({// Now points to the main siterootSite: true,sites: ["my-app","app-overview",// ...],apps: []}), -
To open the overview site when executing
pnpm dev, configure:vite.config.ts server: {open: "/app-overview/"}
-